Does your weekly modules in Blackboard include pictures of file folders that you would like to get rid of? In today’s FLC I’m going to show you, step by step, how to remove those folders and add new “icons” to make your modules cleaner and easier for your students to navigate.
(Tip: My recommendation is to build modules with the oldest at the bottom, and newest at the top, so when the student opens it up, they see the latest first.)

This is what your course modules may currently look like.

The first step is to create the icon you want to use. You can do this in any program that you like, such as Photoshop. I created mine in Powerpoint.

______________________________________________________________________________________________________________________
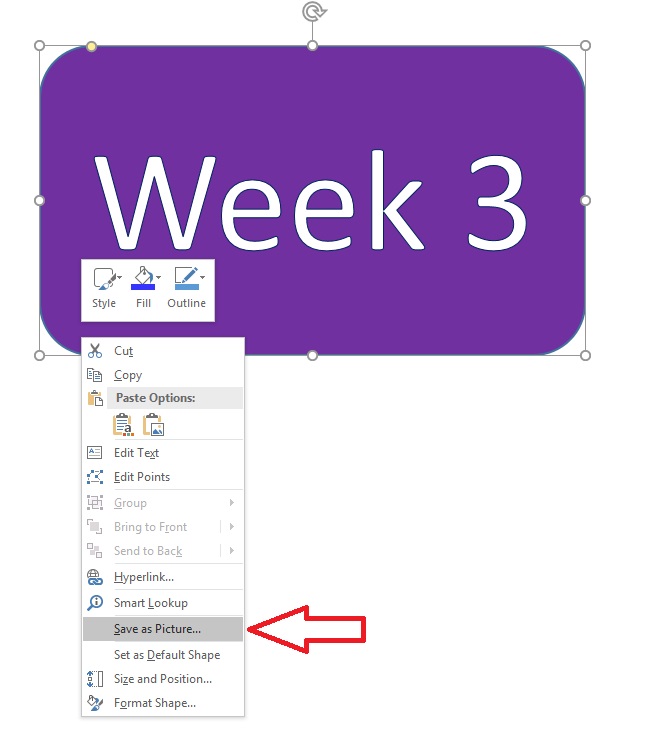
Next you will save your icons. This is how I saved mine in Powerpoint. Do this for each slide by hovering over the icon image and right clicking.

______________________________________________________________________________________________________________________
Once the Icons are saved, go into Blackboard and click on the chevron, and then “edit” in the drop-down menu as shown below.

______________________________________________________________________________________________________________________
When in the edit screen move your text down and place the cursor at the top left, then click on the “Insert/Edit Table” button.

______________________________________________________________________________________________________________________
Make sure you are at 2 columns and 1 Row. Then hit the “Insert” button.

______________________________________________________________________________________________________________________
Stretch the table out so it’s easier to work with.

______________________________________________________________________________________________________________________
Place your cursor in the left column box and insert your image. Just click the Insert Image button and find where you saved the icon.


If your image is too large (like mine is above), you will need to change the size and re-save it prior to inserting into Blackboard. My finished images are 187 pixels by 106 pixels, so pretty small already, but much bigger than the “folder” icons they are replacing.
______________________________________________________________________________________________________________________
In the right column add text. In my case I wanted the students to have the exact week dates for the weekly modules.

______________________________________________________________________________________________________________________
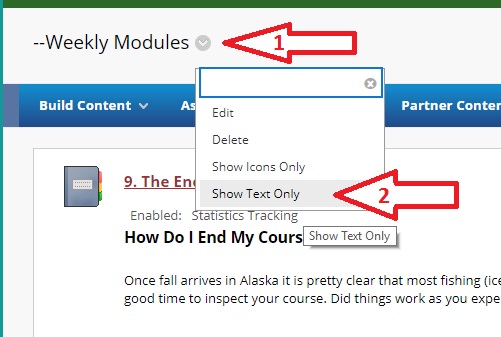
Now, go to the top of the page so you can modify the entire content area for all weeks. Click on the chevron to reveal the dropdown menu and click the option to “Show Text Only.” This will get rid of the “folder” icons and leave your page looking clean!

______________________________________________________________________________________________________________________
That’s it!!! Your weekly module are clear to students, and extraneous information (the folder icons) have been removed.

______________________________________________________________________________________________________________________
Let me know if you have any problems cleaning up your Blackboard content page, and thanks for subscribing to the FLC. Have a great weekend!!

